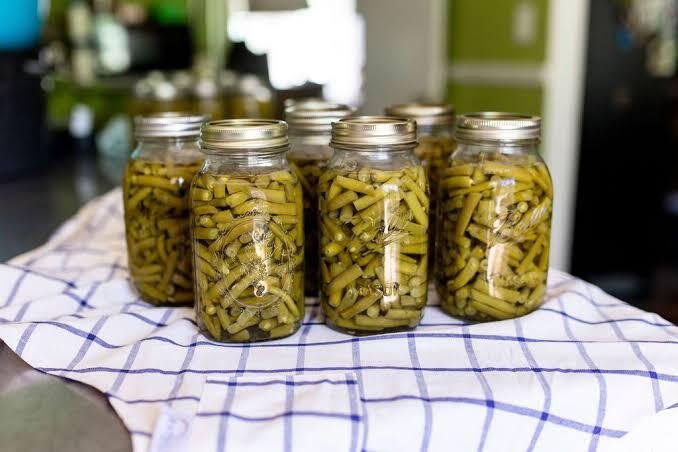
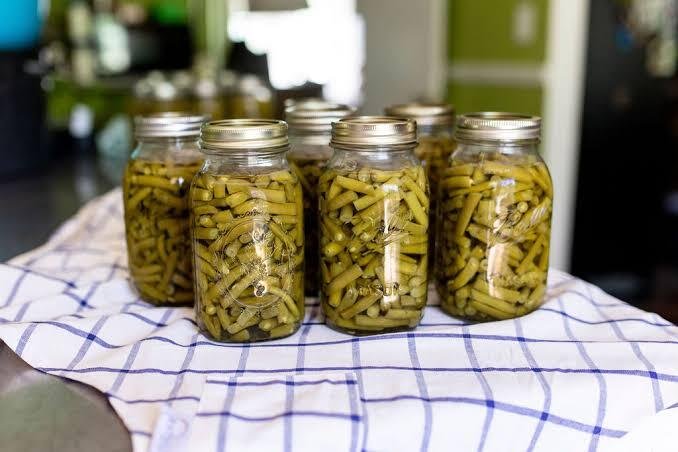
Canning your own green beans is a satisfying way to preserve a garden harvest or a big farmers market haul, giving you shelf-stable jars of beans ready to use all year long. Unlike high-acid fruits, green beans are a low-acid vegetable, which means they must be processed in a pressure canner rather than a water bath canner to be safely preserved. This guide walks through the raw pack method step by step.
Important Safety Note
Green beans are a low-acid food, and low-acid foods can harbor the bacteria that causes botulism if not processed correctly. A pressure canner (not a water bath canner and not an electric multi-cooker’s “canning” setting) is required to reach the high temperatures necessary to safely can green beans. Always follow your pressure canner’s manufacturer instructions and use tested, up-to-date guidelines, such as those from the USDA or your local extension office.
Ingredients
- Fresh green beans, as many as you’d like to can (about 2 lbs of beans fills roughly 1 quart jar)
- Canning salt (optional, ½ teaspoon per pint jar or 1 teaspoon per quart jar)
- Water, for filling jars
Equipment
- A pressure canner
- Quart or pint canning jars with new lids and bands
- A jar lifter
- A canning funnel
- A bubble remover or thin plastic utensil
- A clean, damp cloth for wiping jar rims
- A sharp knife or kitchen scissors
Instructions
Step 1: Prep your jars and canner
Wash your jars, lids, and bands in hot, soapy water and rinse well. Keep the jars warm until ready to fill. Add the amount of water specified by your pressure canner’s manufacturer (typically 2-3 inches) to the bottom of the canner and begin heating it.
Step 2: Wash and trim the beans
Rinse the green beans thoroughly under cool water. Trim off the stem ends, and snap or cut the beans into pieces about 1-2 inches long, or leave them whole if they fit your jars well.
Step 3: Pack the jars (raw pack method)
Pack the raw, trimmed green beans tightly into the warm jars, leaving 1 inch of headspace at the top. Add the canning salt to each jar, if using — it’s for flavor only and can be omitted.
Step 4: Add boiling water
Ladle boiling water over the beans in each jar, maintaining that 1-inch headspace. Run a bubble remover or thin utensil around the inside of the jar to release trapped air bubbles, then top off with more water if needed to maintain the correct headspace.
Step 5: Wipe, seal, and load the canner
Wipe the rims of the jars with a clean, damp cloth to remove any residue. Place the lids on top and screw the bands on until fingertip-tight. Using a jar lifter, carefully load the jars into the pressure canner.
Step 6: Process under pressure
Lock the canner lid in place according to the manufacturer’s instructions. Heat the canner until steam vents steadily, then vent for the time specified by your canner (commonly around 10 minutes) before adding the pressure regulator or closing the vent. Bring the canner up to pressure and process:
- Pint jars: 20 minutes
- Quart jars: 25 minutes
Processing pressure depends on your altitude and canner type (weighted or dial gauge) — check your canner’s manual or a current USDA canning guide for the exact pressure (commonly 10-11 psi for weighted gauge canners at lower altitudes, adjusted higher for elevation).
Step 7: Depressurize and cool
Once processing time is complete, turn off the heat and let the canner depressurize naturally — do not force it open or try to speed up the cooling process. This can take 30-45 minutes or more depending on your canner. Once the pressure has fully released and it’s safe to open, carefully remove the lid, tilting it away from you to avoid steam.
Step 8: Remove jars and check seals
Using a jar lifter, remove the jars and place them on a towel on the counter, leaving space between them. Let them cool undisturbed for 12-24 hours. Check the seal on each lid by pressing the center — it should not flex or pop. Any unsealed jars should be refrigerated and used within a few days, or reprocessed with a new lid within 24 hours.
Tips for the Best Canned Green Beans
- Use fresh, young, tender beans for the best texture — older, tougher beans don’t can as well.
- Don’t skip the pressure canning step. Water bath canning is not safe for low-acid vegetables like green beans.
- Adjust pressure for your altitude, since higher elevations require increased pressure to reach a safe processing temperature.
- Label your jars with the canning date so you can track freshness over time.
- Let the canner depressurize naturally — rushing this step can cause liquid loss from the jars or affect the seal.
Storage
Store sealed jars in a cool, dark pantry for up to 12-18 months for the best quality. Once opened, refrigerate and use within about a week.
Final Thoughts
Canning green beans takes a bit more equipment and care than water bath canning fruit, but the process is very manageable once you understand the steps. Having a pantry stocked with home-canned green beans is a rewarding payoff for a bit of time spent in the kitchen during harvest season.